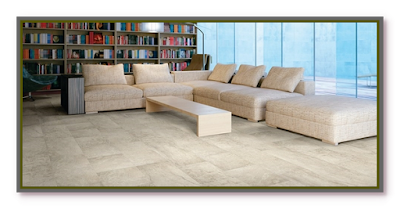
How to Tile Installation
A tile floor adds style to any room. It's also durable, easy to clean and a project you can take on with confidence. Learn how to install and grout tile.
Preparing to Install Floor Tile
First, make sure you have prepared the sub-floor properly before you begin laying tile. Before beginning, remove tiles from the different boxes and randomly mix them to ensure that minor color differences don’t form an unwanted pattern in your new floor.
Keep in mind that floor tiles should be laid with the first tile centered in the middle of the floor, working onward from that.
Surface Preparation
Start by removing the existing flooring. Scrape off any residual adhesives or mortar, and clean the floor thoroughly.
Check to see that the sub-floor is flat and level. Fill any low spots and cracks in a concrete sub-floor with concrete patching compound.For wood framing, make sure the sub-floor is dry, rigid, and securely attached to the joists.Never apply tile directly to plywood or a wood sub-floor. Instead, cover the sub-floor with cement backer board,using corrosion resistant screws that are countersunk flush with the surface of the backer board.Trim the bottom of the door jambs so the tile will fit under them using either a handsaw or jamb saw (available to rent at tool rental centers).
Layout
Consider how the tile can best be laid out to maximize aesthetic appeal and minimize cutting. The tile can either be centered on the floor, or full tiles can be used along the most visible walls. When laying out the floor:
1)Check square: Measure the length of each wall, and the diagonals from corner to corner. The room is square if opposite walls are the same length and the diagonals match.
2)Establish Guidelines: Pop chalk lines on the floor parallel to the walls to act as guides for laying the tile.
Laying Tile
Mix up thin-set mortar in a 5-gallon bucket using a mixing paddle chucked into a low speed drill. Follow the instructions, being sure to use the correct ratio of water to mortar mix.
Make up only as much mortar mix as can be worked in 15-20 minutes. Keep a bucket of clean water and a sponge handy to wipe off any excess before it sets and to clean tools.
Use a notched trowel to spread the mortar evenly on a small area where you will start laying the tile. Position the tile in the mortar along the guidelines and press into place.Following the guidelines, position the next tile, using plastic spacers to keep the joints uniform.Check the alignment of the tiles as you go along to be sure they are both level and straight.When laying tile, work from the sub-floor to avoid putting weight on the new tile, and allow it to set for 24 hours before walking on it. Work backward toward a doorway to keep from working yourself into a corner.
Cutting Tile
Once the full tiles are laid and safe to walk on, the next step is to cut and fit the partial border tile along the walls.To do this, measure the distance to the wall, minus the width of the grout line, and mark each tile.A scoring cutter can be used to make straight cuts that extend all the way across a tile.Another option for cutting tile is a wet saw equipped with a diamond tipped blade, which can make both through and partial straight cuts.Both types of tile cutting tools can be rented at tool rental outlets. Be sure to wear eye and ear protection when working with power tools.
Tile nippers can be used to make curved cuts by breaking small amounts off at a time. You can also make several parallel cuts with a wet saw, then break off the excess and fine-tune the cut with nippers.A hand-held grinder with a diamond blade can also make curved cuts. Using a dry grinder on tile produces a lot of dust, so work outside or in a well ventilated area and wear a mask or respirator. A small, hand-held wet saw also works well and doesn't generate dust.
Once the border tiles have been cut to size, apply thin-set to the sub-floor. A small, notched margin trowel comes in handy when working in tight places.
Finishing Wall Edges
When fitting border tile next to a wall, leave a small gap that is covered with baseboard or quarter round molding. Another option is to install tile 4” up the wall using thin-set or construction adhesive. Be sure to line up the joints in the baseboard tile with the floor for a continuous look.
Applying Grout
After the tiles are laid and the mortar has set, the joints are filled with grout. Unsanded grout may be used on joints less than 1/8” while larger joints require sanded grout. Clean the joints to remove any dust and debris before filling.
Mix the grout with the recommended amount of water in a 5-gallon bucket using a mixing paddle and power drill. Allow it to sit for 5-10 minutes then stir again. Apply the grout with a rubber float, dragging it across joints at a 45 degree angle.Allow the grout to set up for a few minutes, then wipe off any excess using a sponge and bucket of clean water, working at an angle to the tiles. Wring the sponge out frequently and keep the water clean.
Sealing Grout
Once the grout has hardened for the recommended time, apply sealer to the joints using an applicator bottle or foam brush.
Thank you for reading!
Courtesy----Web.


No comments:
Post a Comment